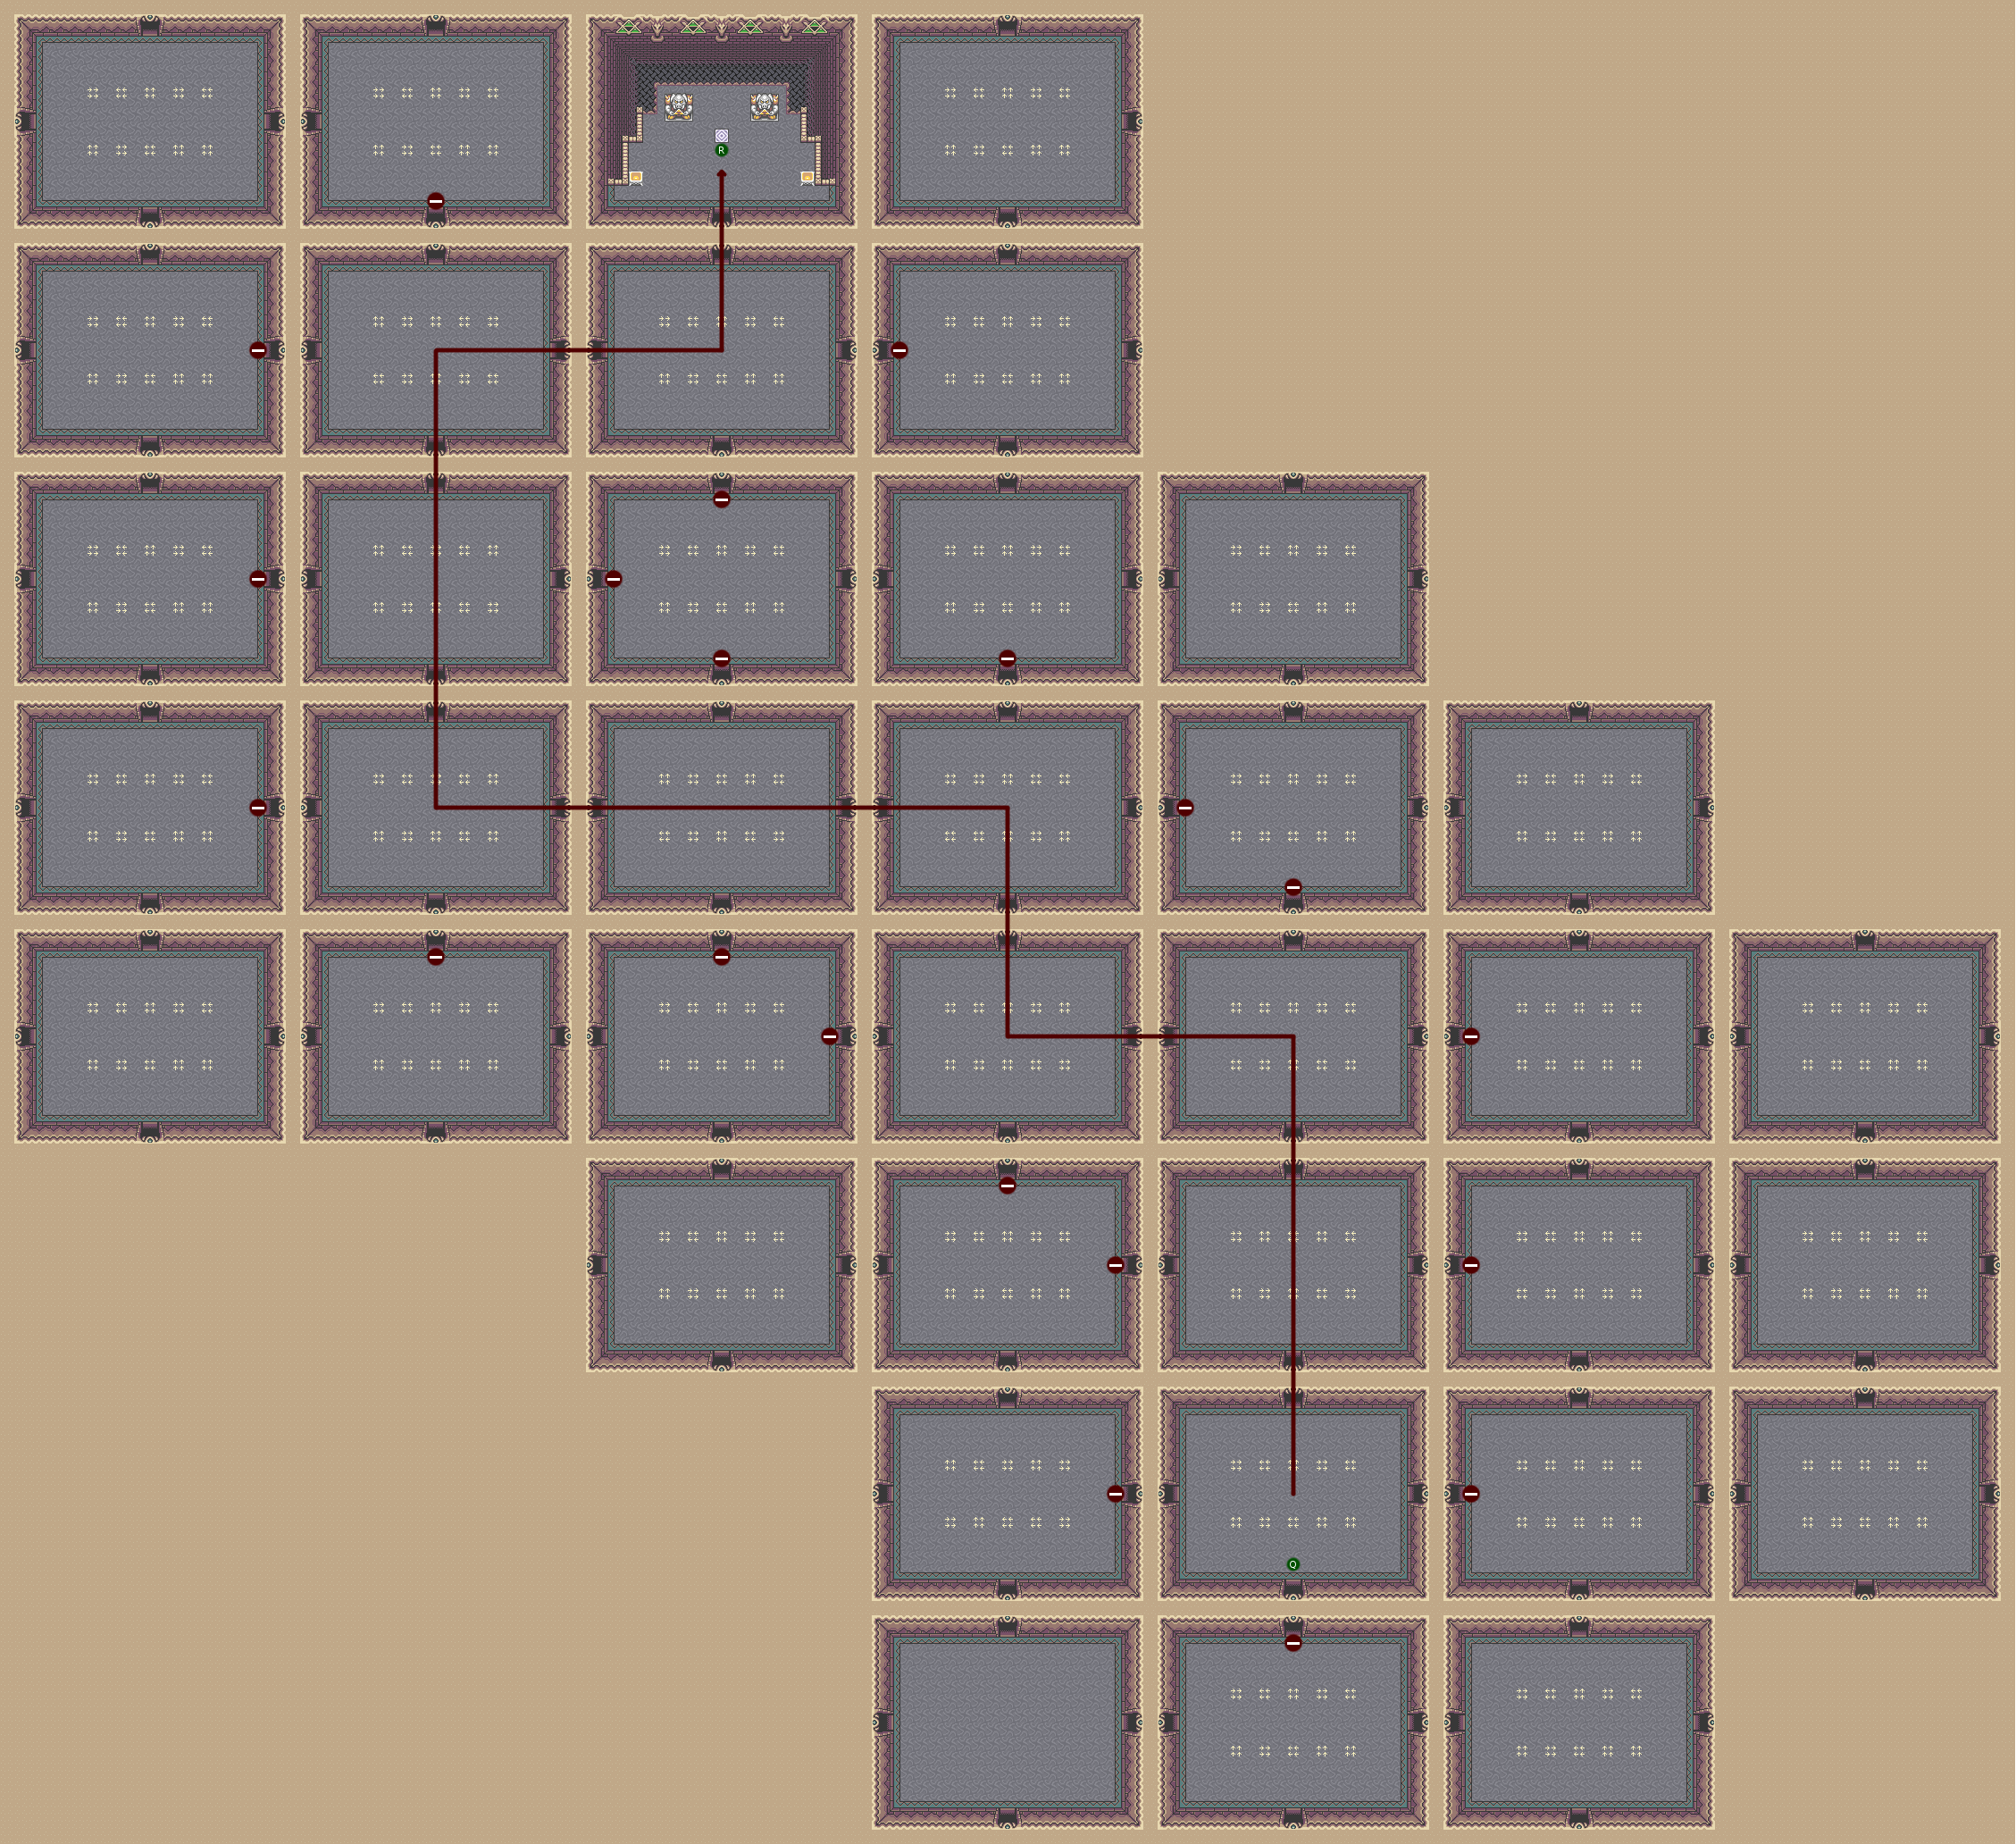
Maps and useful informations
| Floor | Map |
|---|---|
| 4th Floor | 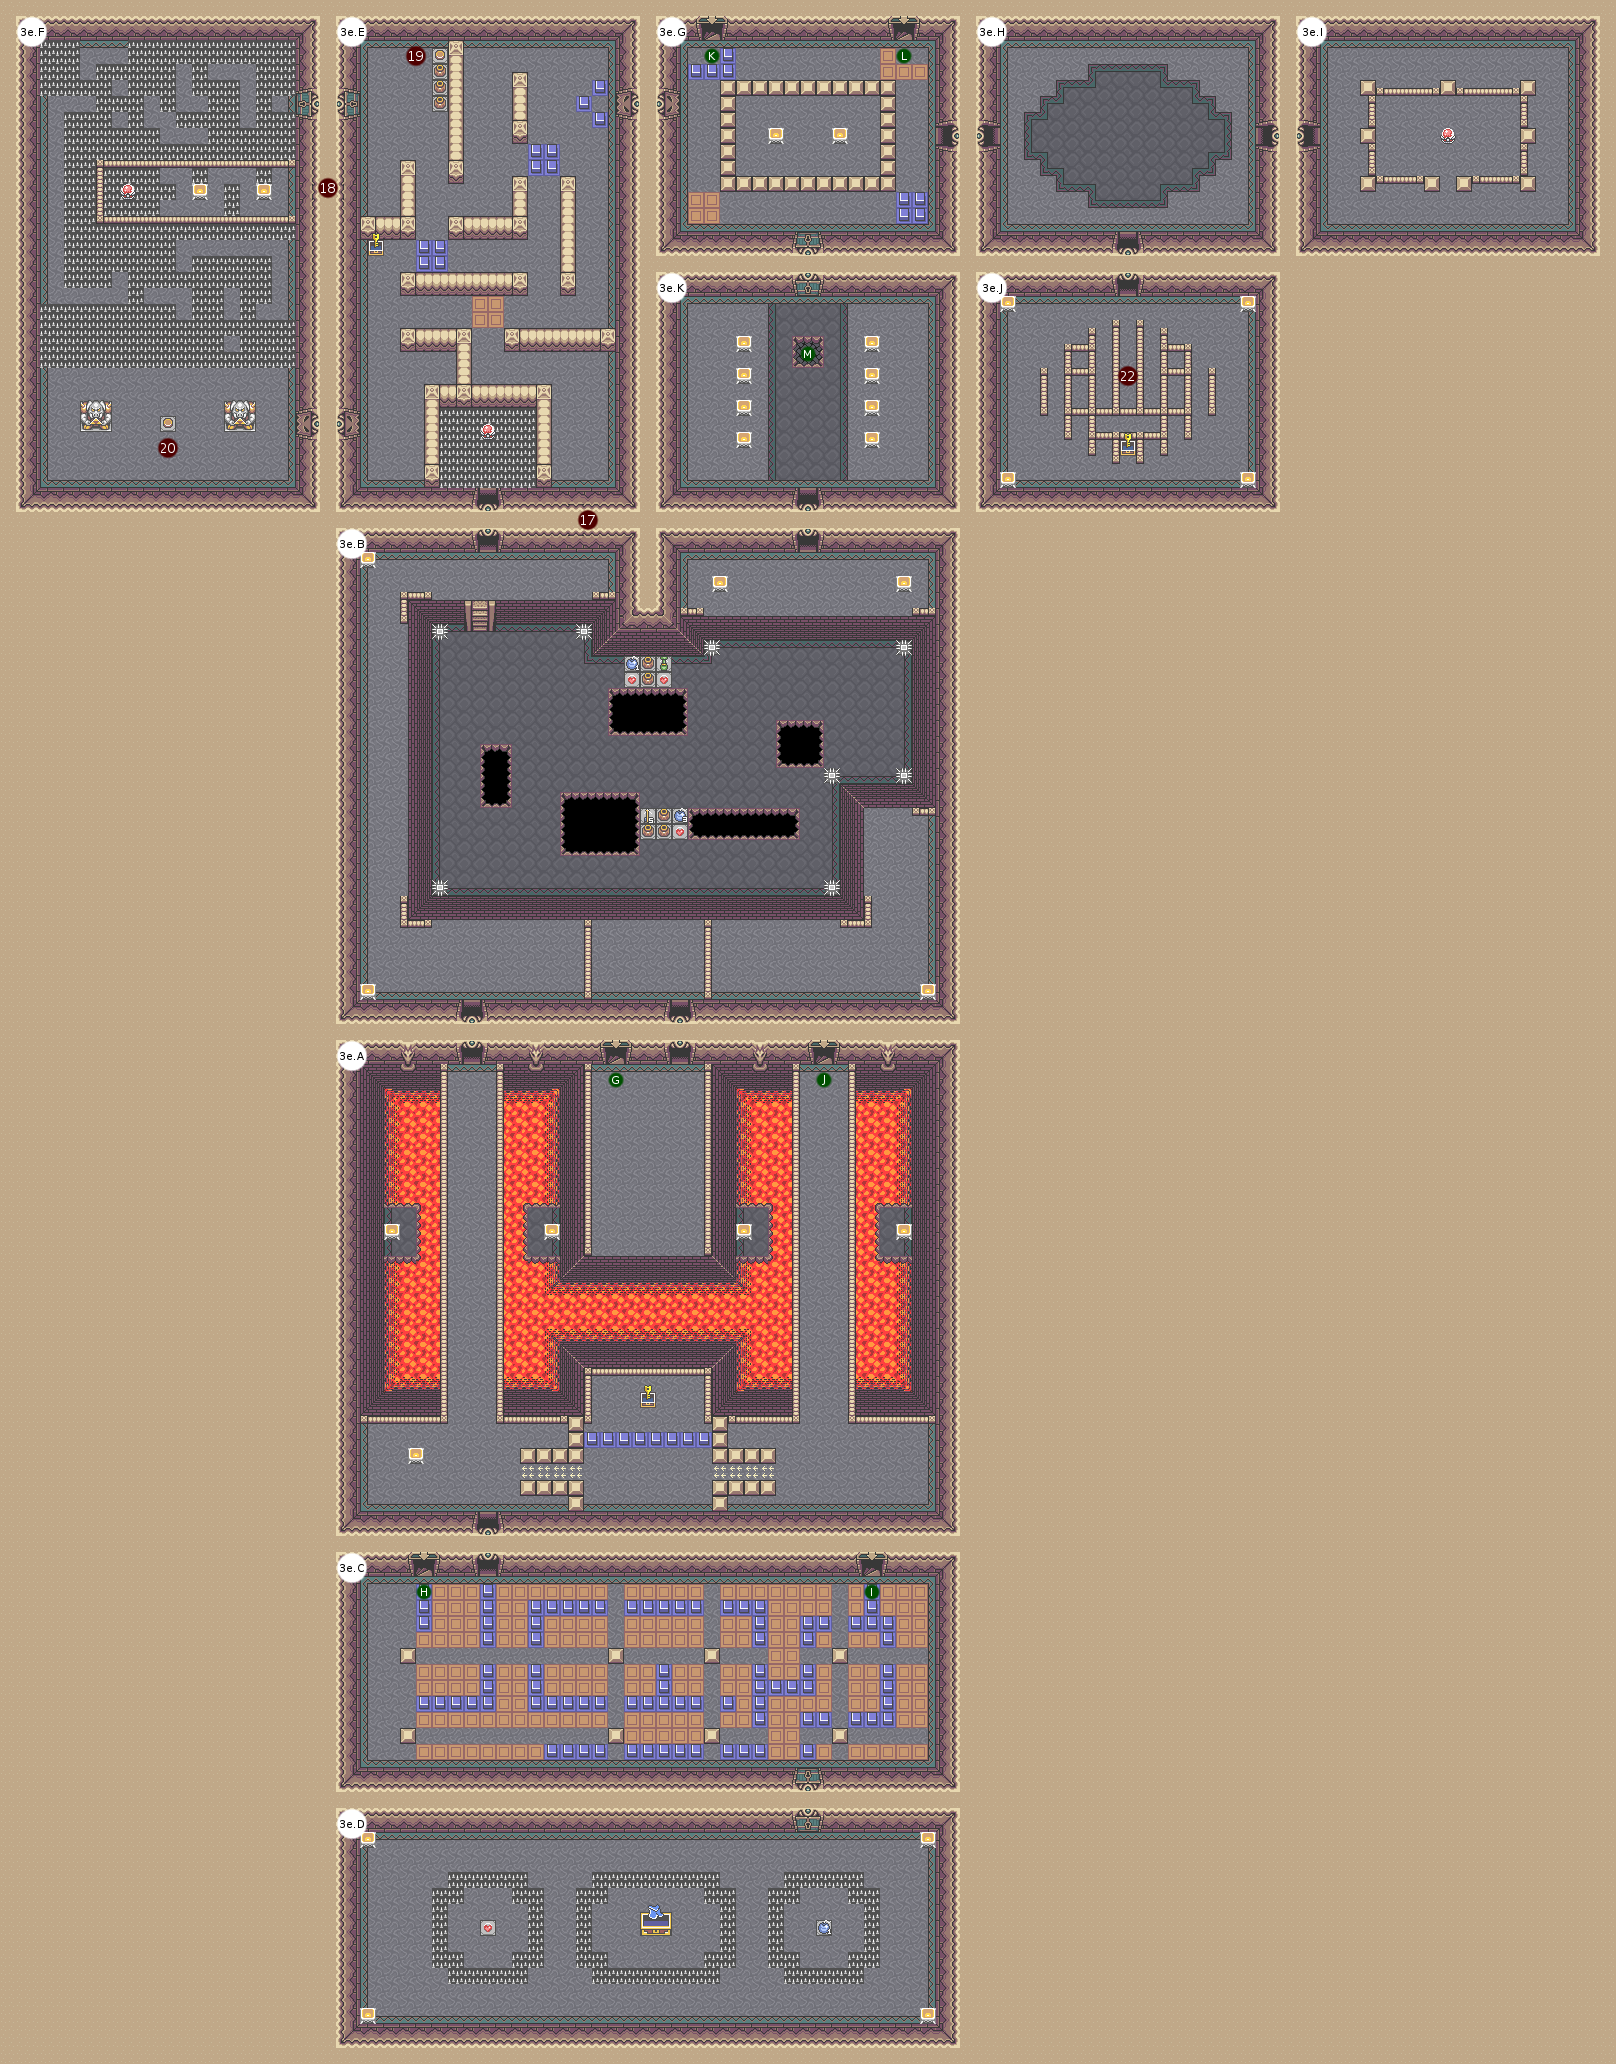 |
| 3rd Floor | 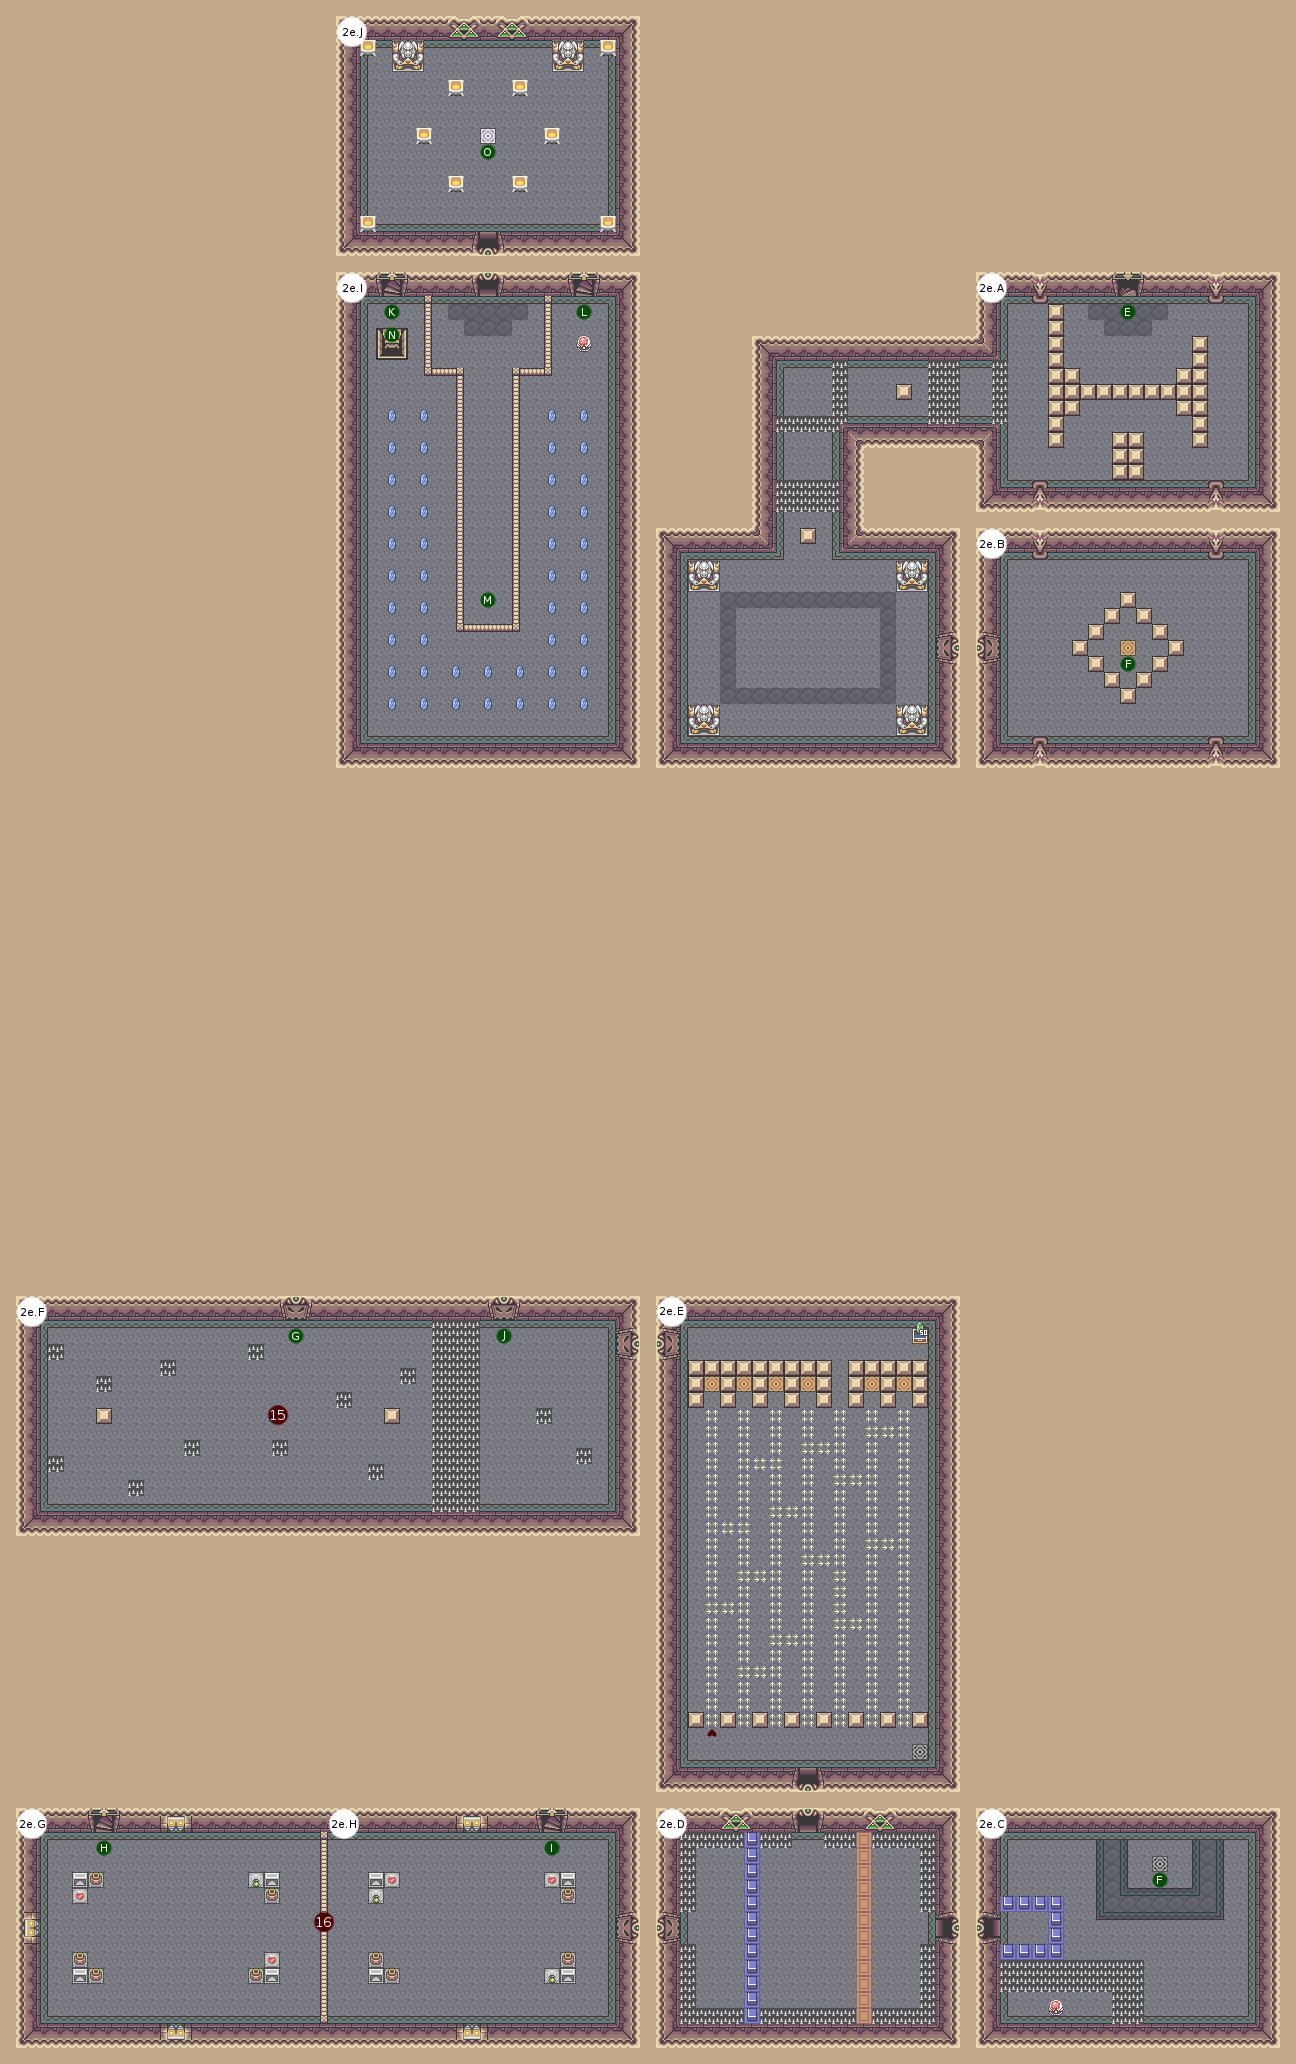 |
| 2nd Floor |  |
| 1st Floor |  |
| Basement 1 | 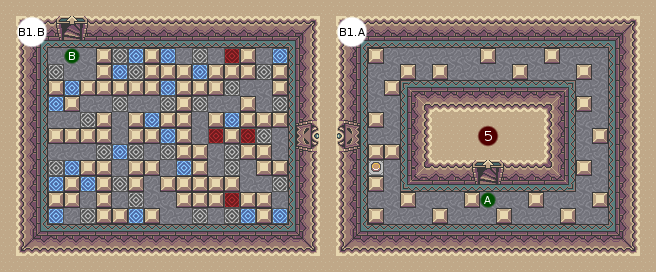 |
| Eagle Dungeon | 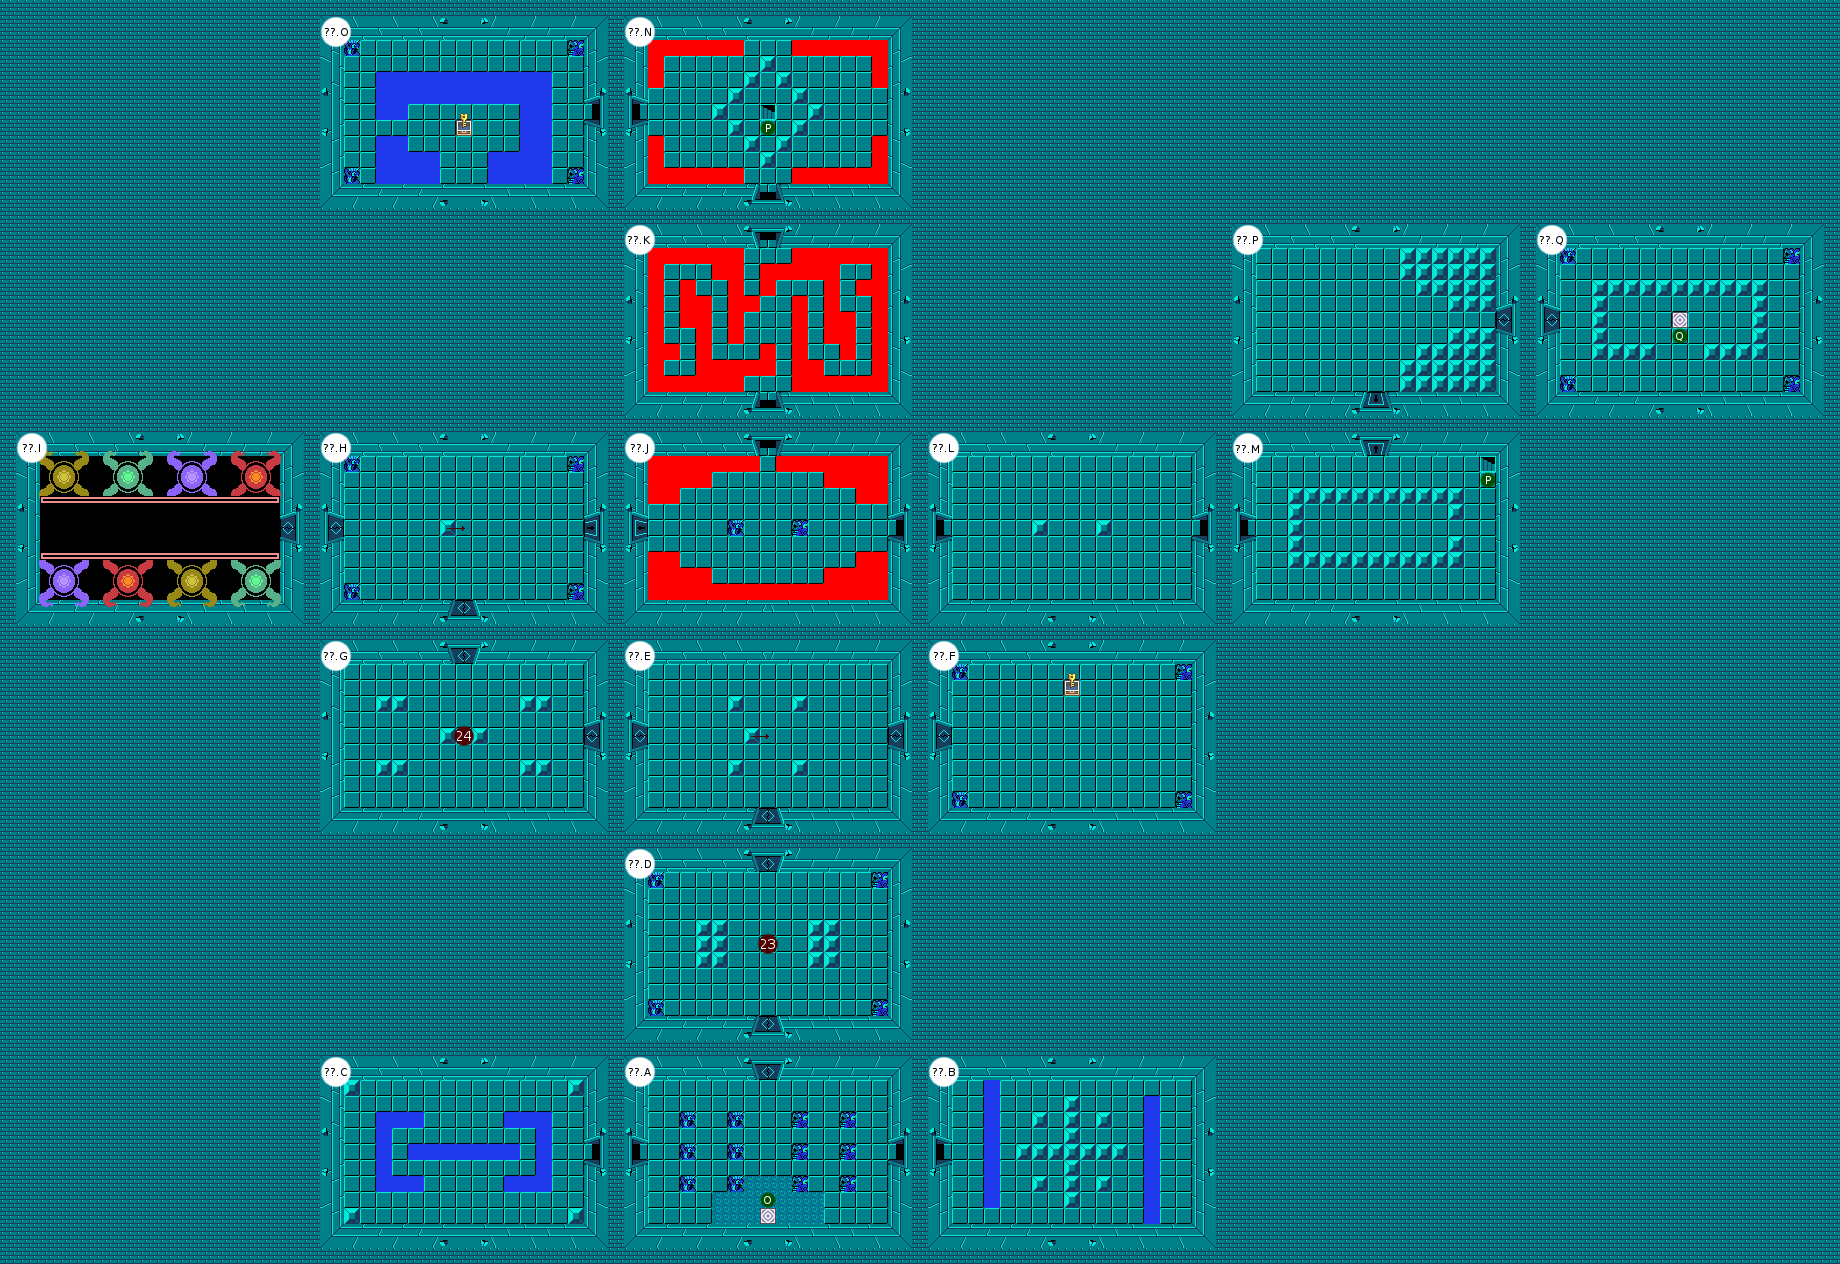 |
| Room | Enemies |
|---|---|
| 1F.B | Blue Pig Soldier (x1), Red Pig Soldier (x1) |
| 1F.E | Tentacle (x6) |
| 1F.J | Gibdo (x2) |
| 1F.M | Blue Pig Soldier (x1), Red Pig Soldier (x2) |
| 1F.V | Blue Pig Soldier (x2), Red Pig Soldier (x1) |
| 1F.Y | Blue Pig Soldier (x2), Red Pig Soldier (x1) |
| 2F.A | Blue Pig Soldier (x1) |
| 2F.B | Blue Pig Soldier (x1), Red Pig Soldier (x1) |
| 2F.C | Blue Pig Soldier (x2) |
| 2F.D | Blue Hardhat Beetle (x1), Red Hardhat Beetle (x1), Blue Pig Soldier (x1) |
| 2F.G | Gibdo (x2) |
| 2F.J | Blue Pig Soldier (x1) |
| 2F.K | Red Pig Soldier (x2) |
| 2F.M | Blue Hardhat Beetle (x1) |
| 3F.A | Gibdo (x2), Skeletor (x2) |
| 3F.F | Blue Hardhat Beetle (x9), Red Hardhat Beetle (x7) |
| 4F.B | Blue Hardhat Beetle (x2), Red Hardhat Beetle (x2), Blue Pig Soldier (x2), Red Pig Soldier (x1), Bubble (x1) |
| 4F.D | Blue Hardhat Beetle (x1), Red Hardhat Beetle (x1) |
| 4F.H | Gibdo (x2), Tentacle (x2) |
| 4F.J | Red Pig Soldier (x2) |
| ??.B | Skeletor (x1) |
| ??.C | Skeletor (x2) |
| ??.D | Blue Dogman (x1), Red Dogman (x1) |
| ??.F | Helmasaur (x3) |
| ??.G | Gibdo (x2) |
| ??.L | Skeletor (x1) |
| ??.M | Blue Hardhat Beetle (x1) |
| ??.P | Khotor (x1) |
| # | Event |
|---|---|
| 1 | Kill all enemies to open the door |
| 2 | Light up torches to reveal path |
| 3 | Activate switches counterclockwise |
| 4 | Chest appears when all enemies are killed |
| 5 | Timed door: 12s |
| 6 | Activate central buttons to reveal the chest |
| 7 | Chest appears when all enemies are killed |
| 8 | Hidden switches under the skull to reveal the chest |
| 9 | Open the chests in this order: 3 6 2 7 5 1 4 |
| 10 | Kill all enemies to open the doors |
| 11 | Activate switches counterclockwise |
| 12 | Light up torches to reveal path |
| 13 | Kill all enemies to open the doors |
| 14 | Go into shelter down, up, down and down |
| 15 | Kill all enemies to open the door |
| 16 | Follow hint stone to open the door |
| 17 | Drop a bomb to open the path |
| 18 | Drop a bomb to open the path |
| 19 | Timed chest: 5s |
| 20 | Hidden switch under the skull to open doors |
| 21 | Hidden switches under the skull to create a shortcut |
| 22 | Chest appears when all enemies are killed |
| 23 | Kill all enemies to open the doors |
| 24 | Kill all enemies to open the doors |
Walkthrough
Before you start in this dungeon, you can watch the soluce at this location](09-impression-of-deja-vu.md) to collect 300 rupees and the Bone Key (necessary to obtain an extremely powerful optional item, see the interview of Billy the Reckless for having more clues) and recover Piece of Heart #31 (shown here). Buy the latest upgrades you want in the village shop, and you’re good at storming the last dungeon of the game.
It will be extremely long, you will be warned. In the second room, kill the two Pig Guards to open the door. In the next room, you have to clear your way by lighting the torches to make it appear. If it disappears it remains practicable, but you will not see where you put your feet … Take the room to the southeast first and follow the path to find a Small Key at the end. Return to the room with the invisible slabs, then this time take the northwest exit. Again a maze of teleporters. First take the bottom one, the left one and the top left one. Open the locked door. Use your grappling hook to reach the skull north of the new room, and activate the button it hides. Head south. Operate the buttons in a clockwise fashion, regardless of the first. Pass the room with the red buttons on the left, and in the next room use your grappling hook to reach the skull on the central platform. By killing the two Gibdos that appear, you reveal a chest containing 300 rupees. Go to the north room and turn on the crystal switch to turn blue, then go down one floor from the Gibdos room.
In this room, you will have to walk in twelve seconds to get through the door. No need to run, with all the obstacles it will slow you down more than anything else. Once on the other side, it’s left for a new (and last) maze of teleporters. You can refer to the special map that shows where each teleporter opens, but you can also follow these directions: take the first teleporter and then the one just left and one step north of your arrival. Continue north one step then take the one on the right. Go up one floor, then in the north room (the room with red buttons), walk on the two buttons of the center. This brings up a chest. Retrace your steps. In the maze, take the first teleporter (not the choice), then the one just above you, right and finally the two notches to the right and a notch down. Go up one floor and take the chest that you made appear: it contains the Map. Return to the room where you took the Small Key to the east of the room: the blue pads are now down. If you do not know where to go in the maze of teleporters, take the one from the top then the bottom right. Once in the room north of where you got the key, kill all enemies to bring up the chest. It contains a small key. Head north and follow the only path available. At the end is a locked door. Fight your way through the plots, blocks, stakes and ravines. In the west room, play with the crystal switch and the skulls to activate the buttons under them and bring up the chest. You will find a Small Key. To return to the teleporter north, the crystal switch must be red.
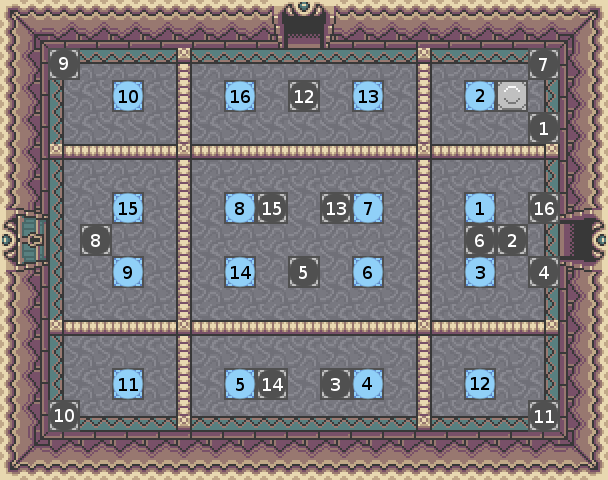
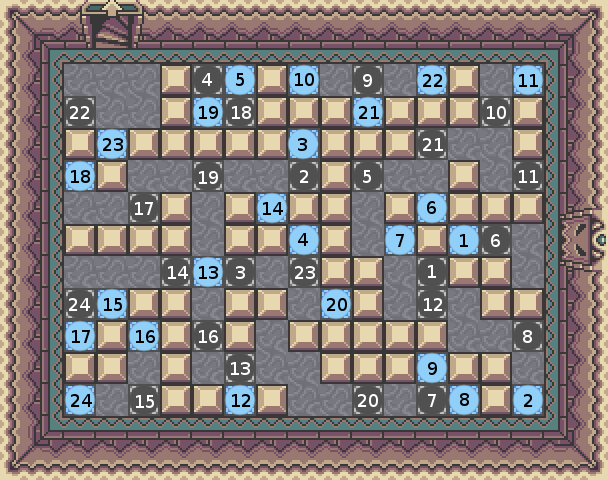
You are ambushed. Kill all enemies to bring up the chest containing the Big Key and open the door. Exit south then east, and take the contents of the Big Chest in this room. You get the Red Tunic. Exit from the south and take the teleporter to the left. Take the first exit north into the Invisible Slab Room. Turn all the switches to exit on the right, then go north. Under a skull two rooms further hides a Small Key. Return to the room with three orange studs, go to the right, then a room to the north and finally to the left below. You arrive at the Grande Porte. Take care of the ravines in this room, they are traitors. Climb up one floor through the stairs to the north. Follow the path between the stakes, do not stop by the locked door. To the east is a small room with seven chests. Open them in this order: 3 6 2 7 5 1 4. You get the Compass. Return to the locked door and open it. Kill all enemies to open the doors. To the west, under the skulls are pimples. As you can see in the index slab, turn them clockwise, regardless of the first one, to open the passages. Take the south, then unlock the door to the east. In the next room, do not go through some places to keep the door open. Always stay further away from the direct path to the door, except at the end where you can walk along the wall. In the next room to the south, you have to use torches again to make the path appear.
At first, take the right. Under the first skull is a button that opens the door. In this room, the golden rule is to always change direction when a line or a hole stands in front of you. Then follow the only path available and at the end you will find a Small Key. Return to the room with the small path in invisible slab, and take the left. You can recover two fairies to the north by pushing one of the blocks to the south (fourth in the left row). Step out on the ledge and retrieve the last Piece of Heart #32. At this point, you should have 20 hearts. Do not jump from the ledge if you do not want to start all over again! Return to the dungeon through the entrance to the east. Make a hook on the left, unlock the door and lift the skull at the top right to open the door. In this room, you have to navigate between the two shelters in the right order. Start with the one at the bottom, then the top one, again the bottom one and finally the bottom one. Go up one floor (the staircase is north of the room).
Follow the path and kill the enemies to open the door. To the east is a teleporter. Play with the crystal switch to lower the blue pads and lift them up. In the west room, you have no choice and must go out to the north. Take the path to the left and collect the 50 rupees, then exit to the west. Cross the stakes to fall into a new ambush: a multitude of Hardhat Beetles will lead you hard. Do not hesitate to use and abuse paralyzing tools. You have no choice, take the west staircase. Jump down into the north room, take the stairs at the top left, turn on the switch on the other side of the door to the north and exit south. Continue in the next room, and go down one floor by the stairs on the left. Talk to the first slab-clue, and follow the directions by changing the floor when needed. Go through the door thus opened, and take the same path. This time, in the ambush room, take the first door. You can recover a Small Key in the room filled with lava. This one will be used in the room in the south. Behind is the last Big Chest, containing the Magic Cape.
Go north to the door behind which is the crystal switch in the middle of the piles. On his right, the Magic Cape warns you that the wall is weak. Take the opportunity to destroy with a well placed bomb. The crystal switch must be red to move to the next room. Head to the side of the locked door: the Magic Cape tells you a new weak wall. Destroy it with bombs and activate the switch on the other side: you can now solve the enigma of the room to the east. The button showing the chest is located to the north. Turn it on and go to the trunk because it will only be visible for five seconds. It contains a Small Key. Unlock the door to the northwest, follow the path and at the end is a skull hiding the button opening the doors of the room on the right. Continue east and take the stairs behind the blue studs. Taking the first stair encountered, you will open a shortcut for this part of the dungeon with a button hidden by a skull. Go up one floor and hit the jackpot: 230 rupees are waiting for you on the floor (in small cuts of 5 rupees). Turn on the crystal switch and go back to the right. Go east then south. Kill all enemies to reveal the chest containing a Small Key. To the right of the room to the north is the crystal switch that should turn blue. Go back to the room with two stairs, then unlock the door to the south. Fall into the hole and take the teleporter north.
Here you are in the Eagle Dungeon, from the first Legend of Zelda. In both side rooms, there are only Skeletors to kill without consequences. Head north and kill the two Dogmen to open the doors. In the north room, push the block towards the center to open the doors, to the east a Small Key awaits you in the middle of Helmasaurs. Then head west and kill the two Gibdos to open the doors. To the north, push the block again to open the left door. Enter it to arrive in the Solarus Children’s Room, which will explain how to defeat Ganon. Then unlock the door to the east and continue until you reach a staircase. Push the block to the left, and take the Small Key in the room to the west. Return to the stairs and unlock the door north after taking it. Here, Khotor just waiting to be fucked to open the continuation of the dungeon.
You are finally in the last part of the dungeon before the final fight: in these rooms, you must always follow the arrows present in the majority. Here is the right direction: north, north, west, north, west, west, north, north, east, north. The teleporter brings you back to the beginning of the dungeon, so take advantage of it to buy your latest potions, you should have amassed a little fortune in this dungeon. Once ready, jump into the abyss to face Ganon.
Boss: Ganon
Ganon is not complicated in himself, he is just very enduring and, as usual, the more he will lose his life, the more his attacks will be long and difficult to dodge. The key word here is the order of lighting torches: you must absolutely light them in the trigonometrical direction, as in the rest of this dungeon. Whenever the four torches have been lit in the correct order, a block bearing the Triforce symbol appears. You must send this block to Ganon to be vulnerable. During this phase, he will surround himself with bats (usually eight), but needless to stubborn, he is invincible throughout this phase. While you try to light the torches, it will spit fireballs with a flaming spill that will remain on impact, like the Phoenix fireballs. As the fight progresses, more will be the fireballs. Wait until he has finished spitting them to throw the block at him. After each send of triforce block that it wipes, it will make collapse part of the arena. When the four edges are collapsed, phase two will switch on and turn on the torches will show four crystal switches, each having a specific effect (the placement is random at each appearance). They can: randomly display objects on the field (refer to the bestiary for probabilities), stop any ongoing attacks or cancel Ganon’s next attack, send bats burning fixed points on the screen, or make appear the Triforce block. Ganon has 24 life points, you will put as many simple sword shots to kill (less according to the power of your blade).
CONGRATULATIONS!