Maps and useful informations
| Floor | Map |
|---|---|
| 5st Floor | 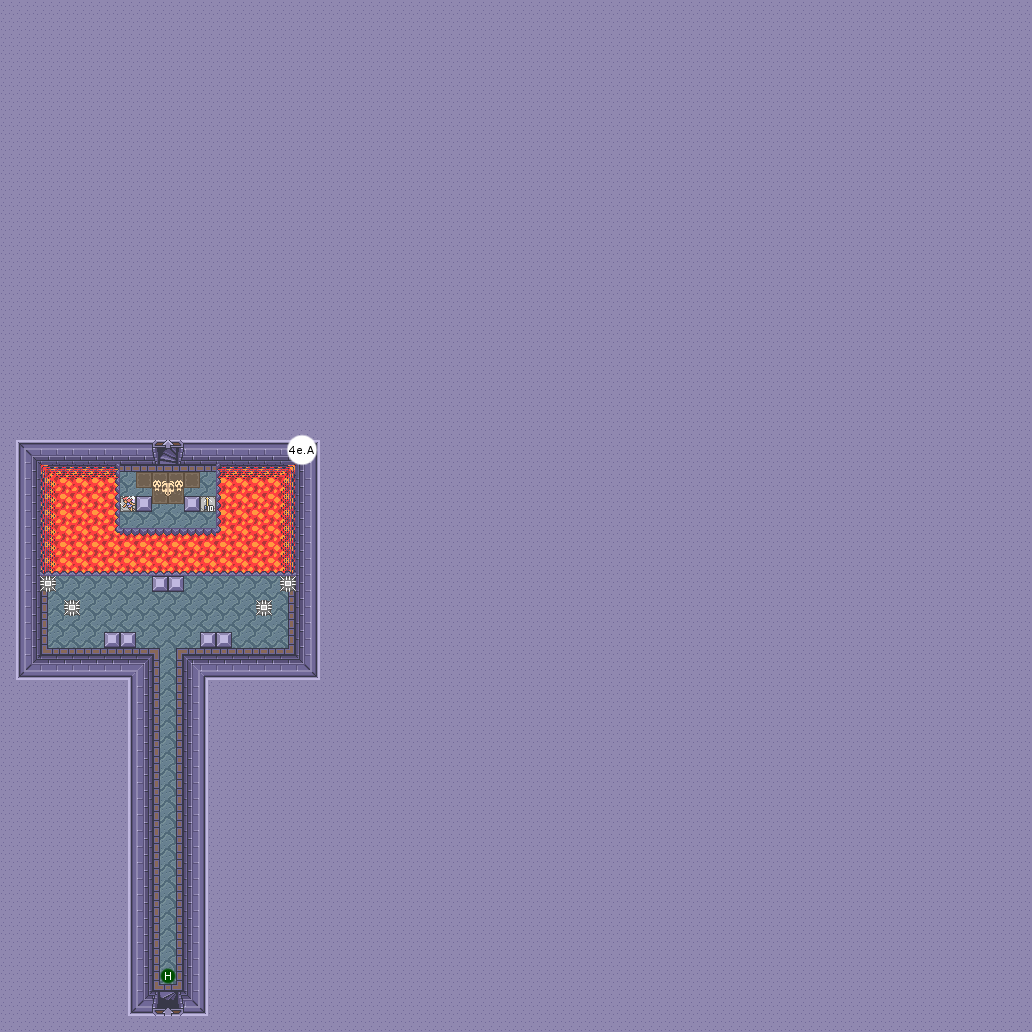 |
| 4st Floor | 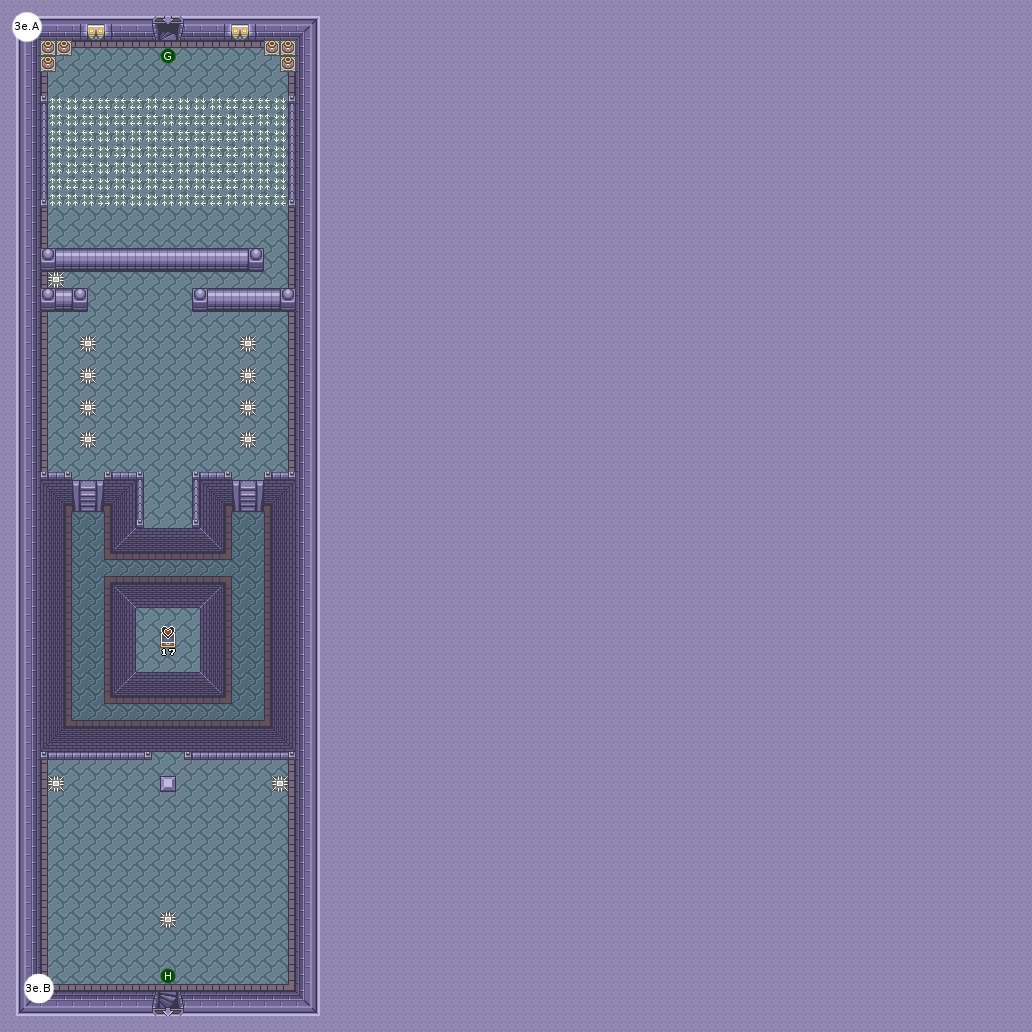 |
| 3rd Floor | 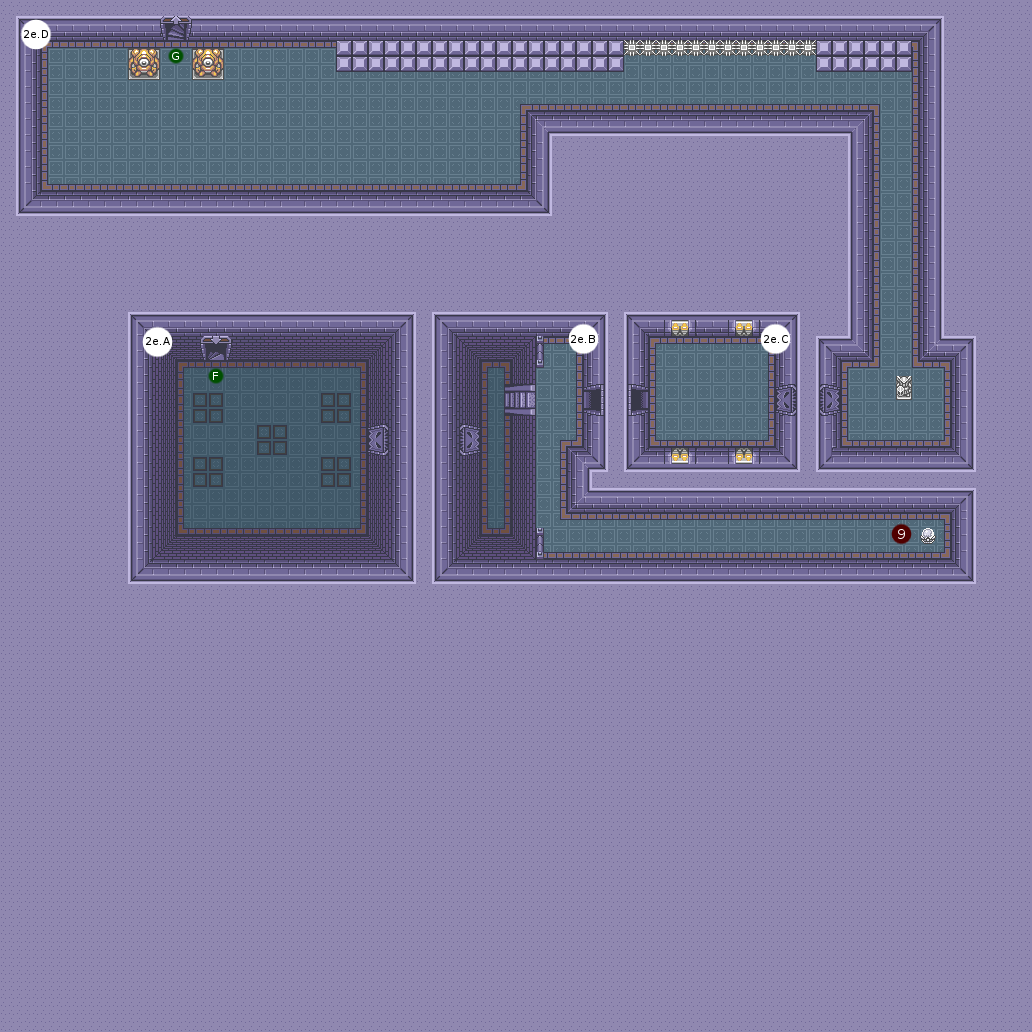 |
| 2nd Floor |  |
| 1st Floor | 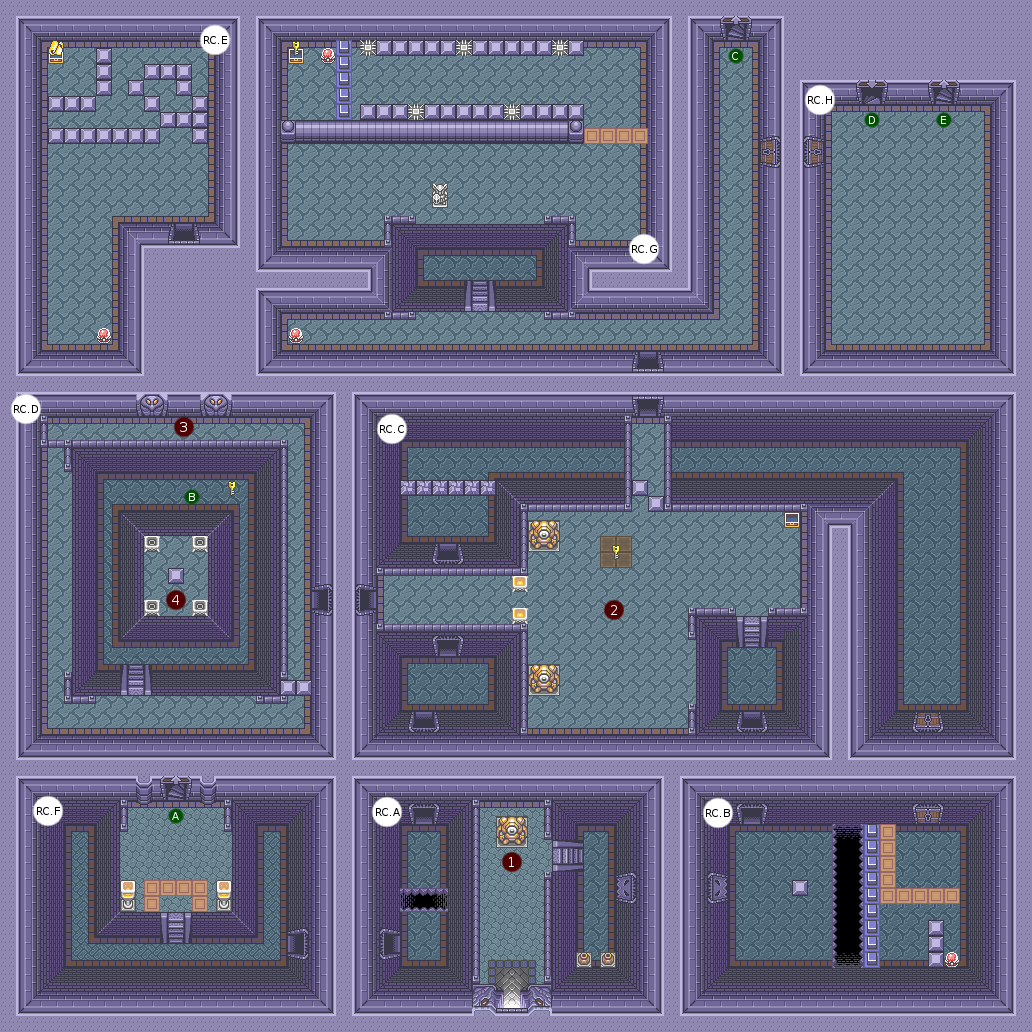 |
| Basement 1 | 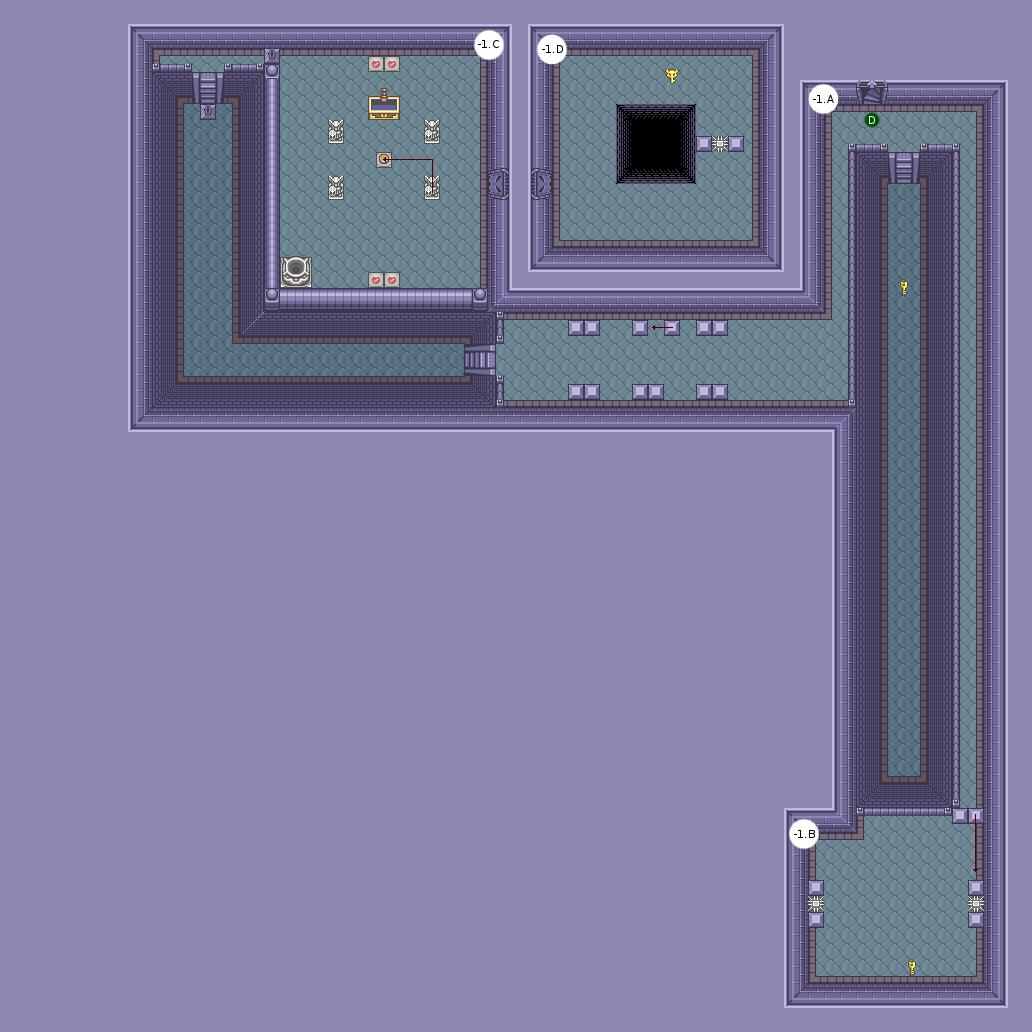 |
| Room | Enemies |
|---|---|
| B1.A | Lizalfos (x1) |
| B1.D | Lizalfos (x4) |
| 1F.B | Tentacle (x6) |
| 1F.C | Bubble (x1), Skeletor (x3) |
| 1F.E | Bubble (x2) |
| 1F.H | Tentacle (x21) |
| 2F.B | Tentacle (x4), Skeletor (x3), Lizalfos (x7), Red Dogman (x2), Blue Dogman (x3) |
| 3F.A | Evil Tile (x20) |
| # | Event |
|---|---|
| 1 | Shoot an arrow to the statue’s eye |
| 2 | Kill all enemies to see the key |
| 3 | Drop a bomb between the two patterns on the wall |
| 4 | Lit up all torches to see the key |
| 5 | A crystal switch is hidden behind the recess |
| 6 | Activate North, South, East, West to get the key |
| 7 | Kill all enemies to get another key |
| 8 | Lit up all torches to free the path |
| 9 | Timed door: 5 seconds (use an arrow and the boots) |
Walkthrough
As soon as you enter, start by shooting an arrow in the eye of the statue to open the door on the right. Follow the only path available until you meet an empty chest and three Skeletors. Kill them all to get a Small Key. You still have no choice, so keep going west to get two patterns on a wall. Put a bomb to release the passage. You can only push one block each time, so you can not block yourself by pushing a block. In the trunk, you get the Map. Before you leave the room, turn on the crystal switch: it must be blue. Go back to the second room (to the right of the entrance) and use your grappling hook. Once on the other side, turn on the crystal switch so that it turns red, and follow the north path. Blow up the awkward blocks, jump over the hole (it looks big but putting you on the edge it goes, and if you fall just make the jump, you will be directly positioned), and go upstairs.
Here you are in the main hall of the dungeon, it is simply huge and teeming with enemies. At first, use your boomerang or an arrow that you shoot from the studs, facing the entrance, to free you a passage. Indeed, there is a crystal switch hidden under the recess to the south. Once on the other side, activate it again so that the orange pads are lowered. Then put a bomb and position yourself on one of the orange studs, no matter which: everything communicates thereafter. You will notice that there are four buttons, scattered north, south, east and west. Activate them in this order. At first, do not kill enemies: you must first leave this room to be able to do everything, save your strength. Once you have the key switches, jump in the hole to the west.
You are back on the ground floor. Climb the stairs and use your grapple to light the four torches. A Small Key appears. Take it, and to start again push the block of right until reaching the room with the skeletors. Go back to the first floor. Take the Small Key under the vase to the northeast of the room, and you now have enough keys to open Tentacle access on the upper platforms where the torches are. Kill all the enemies of the room (the boomerang here will prove of a very precious help, because they are sturdy enough) to have the last Small Key. Light all the torches so that a new path awaits you. Take it and go downstairs.
Follow the only path for now. The crystal switch must be red. You will have to be fast enough. Put a bomb on the switch, use your grapple on the statue and go on the other side of the studs. While walking, you have time but do not hang around. Carefully pass the hallway trapped by the spades and open the trunk. A new Small Key for you. Go back (do not forget to put the crystal switch back in red). South of this room, you can open a shortcut that will always remain active by pushing the block: it is the room of the three skeletors. Now, go back north and up the stairs but turn right to open the locked door. A butcher’s shop is waiting behind you: twenty or so Tentacle are waiting for you to get chopped. Indulge yourself, and then go down one floor.
Walk along the right wall that goes south, push the block twice to pass and then use the grapple to recover the Small Key. Return to the top of the canal, go west and return to this passage its original symmetry. This will empty the water unveiling, oh surprise: a Small Key. Do not bother, there is nothing at the end of the canal. Continue west and kill the Lizalfos. Open both blocks, and push the southeast statue on the button in front of the chest. In the room on the right, four Lizalfos will attack you. Defend yourself, and you will get … The Big Key! Take advantage of this unique opportunity in the game to seize the Big Key in an original way (grapple, boomerang, …), because it will be the only time you will see it outside a chest. Open the Big Chest in the next room and you will have the Half Magic Meter. Return to Tentacle’s crowded room, and go up one more floor. Take the chest (the Compass), jump below and open the Great Gate west of this room.
Wait for the evil slabs to settle down (there are twenty: five groups of four) and continue east. The bottom path leads to a timed and very fast crystal switch (5 seconds): activate it with an arrow and use your boots to dart through the door that has just opened. A passage I love where you have to run along the south wall to dodge all the spades is waiting for you. It’s nice to see and safe. Climb to the upper floor.
Do not worry about the enormity of the labyrinth trapped: the path to the right allows you to go down, the one to the left to go up. Easy as pie. Beware of spades, go south carefully. You will see a chest in the middle of a platform. Use the grapple, open it: it contains Piece of Heart #17. The spikest ball furthest to the south only to the door, be careful before you engulf (and especially, if you go down, think to charge directly to the side …). Follow the only path available and you will come to the boss (no Boss Key, like the last dungeon: it’s normal).
Boss: Poutroxor
It is a revival of the Phoenix. Target his rider as soon as you can, this is his only weak point. At this point, it sends you a single flame towards you, you will have to dodge it and succeed in predicting its movement. Once the rider is killed (seven arrows), Poutroxor accelerates and will be more difficult to reach in the middle of the race. His mouth is his only weak point, aim sparingly. He sends a dozen fireballs in a random direction, be careful, but this is also his greatest weakness because it stops and you can send him two arrows easily at that time. You will need seven arrows again to kill him. With your victory, you get a new sword twice as powerful as the old one: the Hylian Blade.
WARNING: like Dungeon 5, if you save and exit just after the boss, you will not start at the foot of the Tower, but at the exit at the top of the Tower, and will have to make the whole trip in the opposite direction : remember to go in and out first at the foot of the tower if you want to stop there.