Maps and useful informations
| Floor | Map |
|---|---|
| 4st Floor |  |
| 3rd Floor | 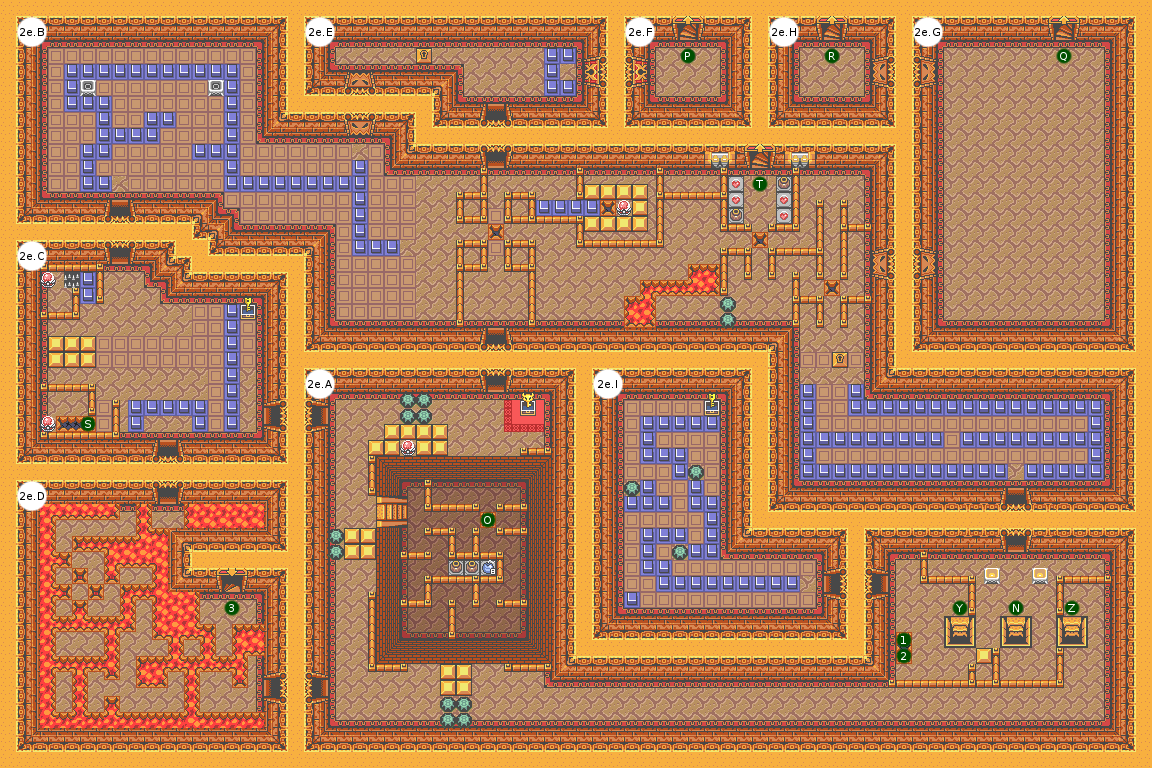 |
| 2nd Floor | 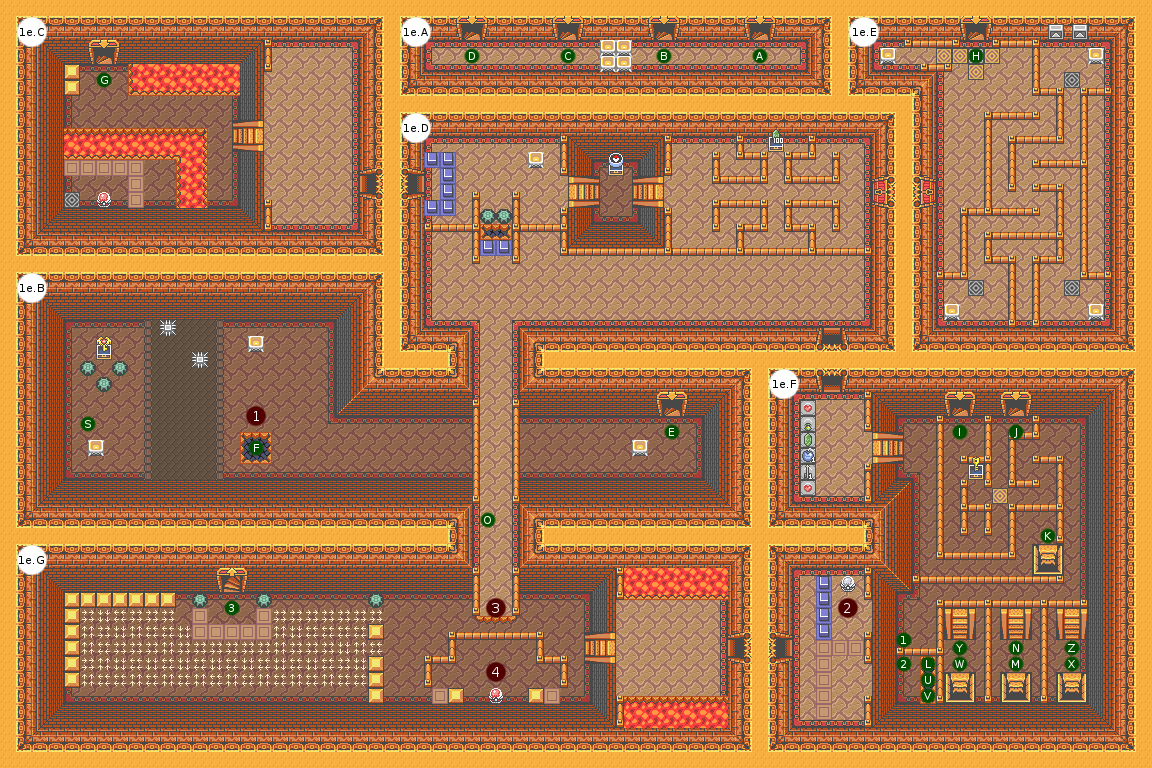 |
| 1st Floor | 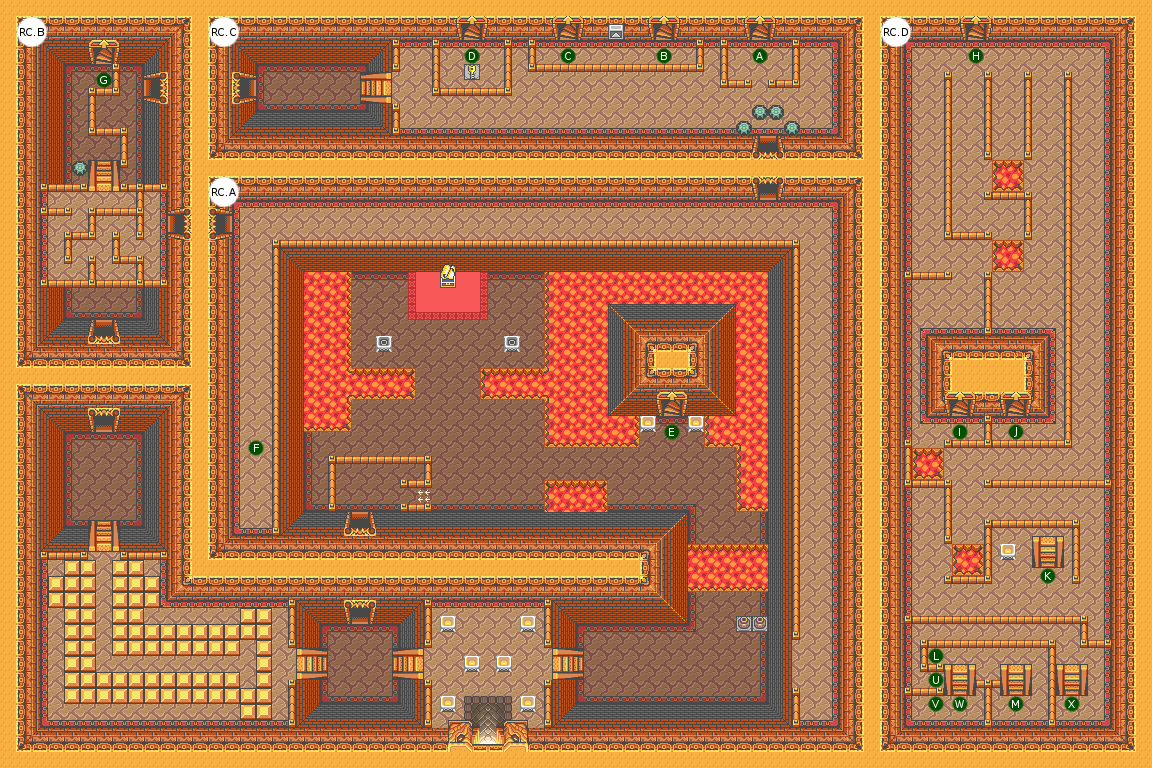 |
| Room | Enemies |
|---|---|
| 1F.A | Blue Hardhat Beetle (x3), Red Hardhat Beetle (x1), Ropa (x1) |
| 1F.C | Blue Hardhat Beetle (x1) |
| 1F.D | Blue Hardhat Beetle (x2), Ropa (x1) |
| 2F.D | Blue Hardhat Beetle (x1), Ropa (x1) |
| 3F.A | Ropa (x3) |
| 3F.B | Blue Hardhat Beetle (x1) |
| 3F.D | Red Hardhat Beetle (x1) |
| 3F.G | Gibdo (x7) |
| 4F.A | Blue Hardhat Beetle (x1), Red Hardhat Beetle (x1) |
| 4F.B | Blue Hardhat Beetle (x1), Red Hardhat Beetle (x1) |
| 4F.D | Red Hardhat Beetle (x1) |
| 4F.F | Drakomos (BOSS) |
| # | Event |
|---|---|
| 1 | Put down a bomb at the crossroad between torches |
| 2 | Empty the pit |
| 3 | Jump with feather from the edge |
| 4 | Bomb it to have enough time to continue |
| 5 | Trapped tile, walk on it again to open the door |
Walkthrough
This dungeon is much more complex than the previous ones in term of course, but much simpler because the enemies are very few. You will have to combine address and memory paths. So start by going to the left, push the block according to the usual pattern: top left, bottom left, and center up. Continue on the only path available. When you pass under the platform, make a diagonal to the northeast (you can not go to the left). Take care of the enemy (I advise to paralyze them with the boomerang, and not necessarily to kill them because the recoil can be more dangerous than anything else … or to kill them with the boots, preventing the recoil. there is no risk, give it to your heart’s content) and go upstairs. You will have to navigate to the left between the two floors until you reach the skull where a Small Key is. Walk back to the entrance. This time take the north exit into the west pit of the entrance. Jump over the arrows, and immobilize the enemies. Here, the battle is tough because of the lava: you can not use your boots safely and hindsight is dangerous. Be careful. Turn both torches north to reveal a chest containing the Map. Climb a floor, you’re in a dead end. Do not try to cross the two spades, it’s useless for now. Instead, put a bomb at the crossing of the torches and dive into the hole. Again, you do not have the choice level path masses. You can return to the entrance going east, but no interest, so enter the room on the left and go up one floor.
You are at the start of a path that you will repeat a few times, as evidenced by the arrival of teleporter next to the crystal switch. Activate the latter via the boomerang or the grapple so that the blue pads are lowered. Do not worry about the chest in the flooded pit yet, you’ll only have it a little later. Take the chest at the top of the pretty crossing in low walls, it contains 100 rupees. Unlock the door on the right. The teleporters in this room are only there to annoy you and bring you all in one of the four arrivals from this room, so jump over the first and get off a floor. In this big, long room, do not go down the stairs in the center: they make a loop, and the teleporter on the top floor takes you back to the crystal switch. Basically, it’s useless for now. Take the path to the right and climb the stairs at the end of the path. You are on the other side of the room at the flooded pit. Continue on the only path, and when you are about to fall below, here you have to be very careful: you must get as close to the edge as possible without falling, and make a jump with the Feather. This is the only really tight passage of this dungeon, because sometimes the perspective plays against you. To give you an idea, it is the shadow of Link that matters, it must be that it is barely on the edge.
But at first, fall voluntarily. Take the right (only available path), activate the crystal switch to empty the flooded pit, jump below and jump over the teleporter at the end of the path. You find a chest with a Small Key. Take the teleporter to find you at the beginning of the path of the previous paragraph. So take the road this time taking the Compass in the formerly flooded pit, and at the end of the path do not miss the jump at the end of the previous paragraph. Take a shot at the crystal switch to lower the orange studs, and go first to the left, take the down arrow, and take the stairs. You arrive in a room full of lava. Take a leap south and take the gate to the east, jump down from the cornice up, take the 8 Bombs under the third vase (you’ll soon need it). Climb the stairs to the west, take the chest containing a Small Key and return to the room with the 8 bombs. There, jump in the hole. You are at the diving board again.
This time, since the crystal switch, you’re going to have a new speed test: put a bomb near the switch and turn to the right to get behind the orange studs. When they are up, everything will be fine. Note that you do not have to use the Pegasus Boots to pass this speed test. Jump below, but be careful: it’s not a gigantic hole you see, but three independent holes each leading to a different part of the dungeon. The right option is the top one, because it allows you to reach both the central staircase among the three, and also to access the same place as if you had taken the bottom hole (the reverse is not true). So, stick to the north wall and jump. Climb the two floors (you have no choice), and head north. Right or left, all paths lead to the locked block. So use your recovered key sooner, and keep taking care to jump over the tiny, slightly treacherous holes. After you have pioneered in the middle of the orange studs following the blue studs, turn on the torches. Enter the next room through the door that has just opened, make the small hook until you reach the hole surrounded by two studs. On the right is the crystal switch allowing you to lower them (a boomerang shot will suffice). A few more steps and you will get (finally) the Big Key. But the studs are not in the right position, so drop directly into the hole below to return (still) to the diving board.
Repeat the journey you have made from this hole, but this time you can access the Great Gate. Go up one floor, and take the northernmost door of the two doors leading you to the room on the right. Going along the wall, you get the Piece of Heart #16 and get a new heart, which will not be too much for the next fight. Continue going east then north. In this room, the slab in the center of the torches is trapped. Iron on (without going over) to open the door and go down one floor. You arrive in an ambush.
Mini-Boss: Melee Gibdo
The boomerang is your friend. Here, this mini-boss who is not one is an attack of mummies very violent in the Zelda universe. There are seven and each takes eight sword strokes to give up the soul. Of course, you can use all the possible weapons imaginable: arrows, skulls, bombs … Just think to immobilize them with the grapple or the boomerang, because they have no recoil in front of your shots and you can quickly make you submerge by the number and resistance of these enemies. By proceeding methodically, you should get by. Do not wait until their paralysis is over to give them a kick / boomerang, it resets the duration of paralysis. The skulls provide you with a lot of arrows, so feel free to use the bow.
Going to the boss
Once this ambush is done, take the northwest exit and open the Big Chest to get the Golden Gloves. The world is yours now. Go into the room with the two crystal switches north of the room full of lava, and jump into the hole in front of the bottom crystal switch. You arrive in the room with three torches (where you had raised the intersection). You can now open the chest to have the Boss Key. Go back to the three glued holes, always take the same path but this time, arrived at the top (second floor therefore), take on the left by pushing the block. You can make your way to the chest containing a Small Key. You are now ready to face the master of the place. To do this, go up a room, and just after the passage with the locked block that you had removed (next to the mini-boss room), jump over the lava to be in the right direction then go north . Under the skulls there are some hearts. Go up one floor, and follow the only path available. Admire the power of throwing black stones: they do twice the damage of the usual stones. At the end of the path is the boss’s room.
Boss: Drakomos
This is a pretty difficult boss, although the strategy is pretty simple: Drakomos will summon small enemies (Helmasaurs), and sometimes instead of summoning one of his servants he will summon a black stone. You will have to cast this black stone on one of the two heads. Each head has its life bar. You will need 4 stone throws per head to kill him. There are two pretty secure points, it’s all on the top left and the top right of the room. Its fireballs can not reach you in these corners, but enemies and stones will not be invoked, so you will have to take risks. A good tactic is to wait a little (he stops invoking his servants when there are a number) so that there are already some black stones on the ground when attempting a raid. If you wait until he is about to spit fire and throw a stone at that moment, his fire is canceled. The fireballs obey precise angles and go in a straight line.
Once killed, recover the Heart Container with your boomerang or grappling hook, and listen to the words of the guard that appears. He gives you a Superior Quiver (usually the Big Quiver because you have not yet afforded the other quiver at the store).