Maps
| Lieu | Etage | Carte |
|---|---|---|
| Mount Terror (East) | 5th Floor | 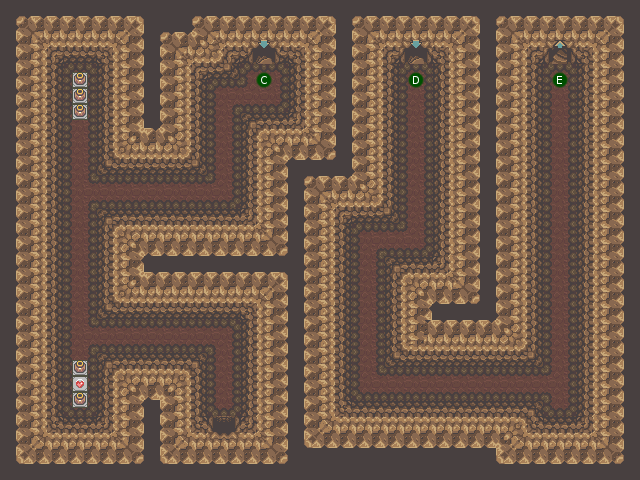 |
| Mount Terror (East) | 4th Floor | 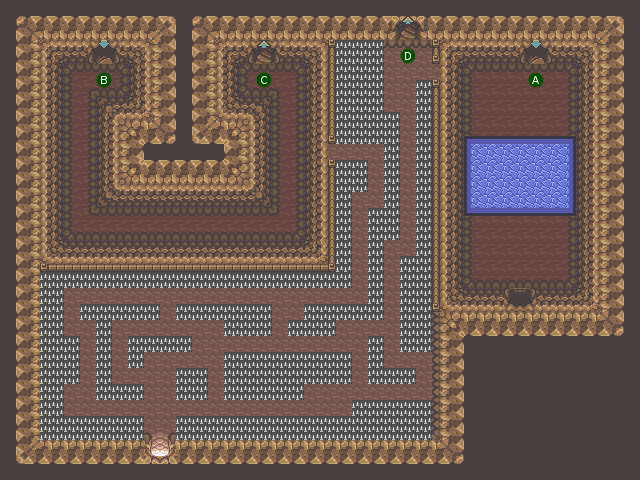 |
| Mount Terror (East) | 3rd Floor | |
| Mount Terror (East) | 2nd Floor | |
| Mount Terror (East) | 1st Floor | 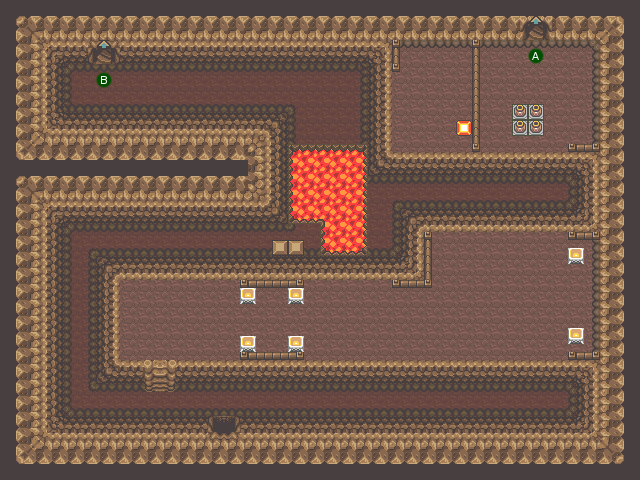 |
| Mount Terror (West) | 3rd Floor |  |
| Mount Terror (West) | 2nd Floor | 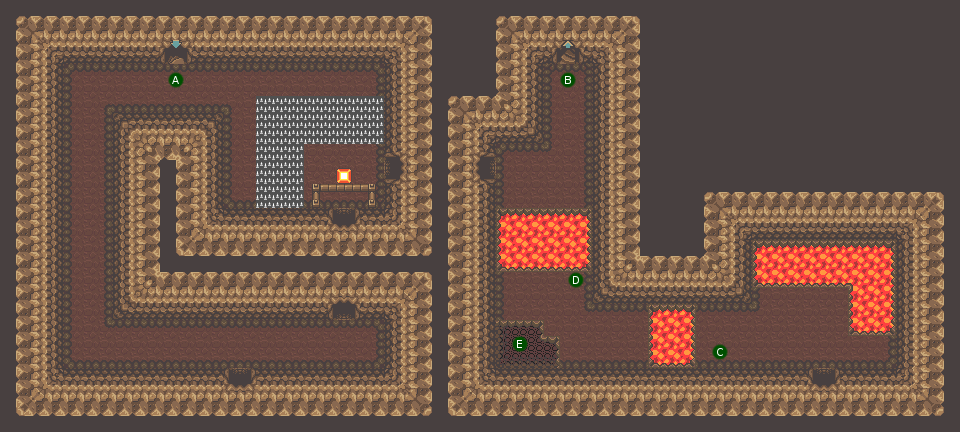 |
| Mount Terror (West) | 1st Floor | 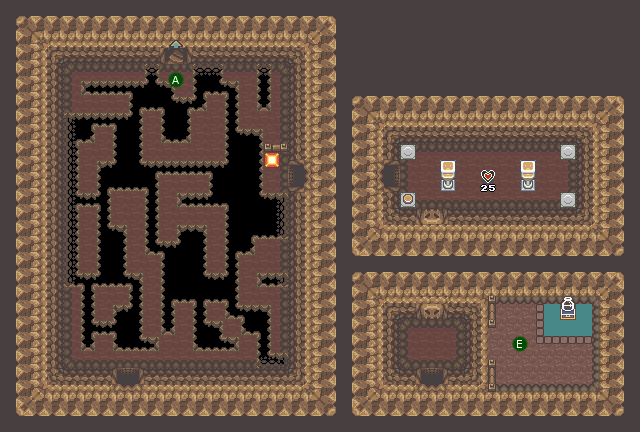 |
With the Cane of Somaria, you now have access to the entire map except two caverns, knowing that these two caves can still be scourged for looting. The first is that of the village with the laser, evoked in the chapter 9 (passage of Dungeon 4 Dungeon 5) where we had just bought the Giant Wallet. The second cave will be explained later in this chapter.
At first, we will make a small point on what you should / could have at this stage of the adventure. If you made the secret dungeon and followed all the directions in this guide, you should have 17 hearts, no Piece of Heart waiting (we will get a lot of it in this chapter), the Giant Ruby Bag, the Big Bag of Bombs, the Grand Quiver, and finally three Bottles. If you have scoured the village’s laser cavern, you have absolutely all the keys, the Hylian Blade, and you have the Mystic Mirror, possibly with Tiger Scrolls (the elements of this last sentence are not necessary to finish the game ). So much for the inventory. You should have enough rupees to buy either the Giant Quiver or the Giant Bomb Bag. The most useful being the Giant Quiver (the Giant Bomb Bag is very optional), consider it in your purchases.
Start by jumping twice from the ledge to the right of the entrance to the Crystal Temple, and go to the left entrance. You are back in the room with the mini-ravines. Thanks to the Cane of Somaria, put a block on the right. To then use the grapple, arrive by the south of the block. The coin on the right contains Piece of Heart #25. The pot at the bottom left hides the button to go out.
Now go back to the village and continue to the Twin Caves, south of the first dungeon. In the left entrance, you had a chest that taunted you. Thanks to the Cane of Somaria, you can now reach it: go to the vase by jumping to the north, put a block behind the wall, go back to the entrance and use the grapple on your block. If you have made the block too close to the edge to be able to pass then in front of the trunk, you can push it easily. Piece of Heart #26 is yours.
Get out, but do not go too far: take a few steps to the west to reach a staircase that goes underground. In this passage you are waiting for 100 rupees if you have not already taken them, and at the end, under the central vase, use your Cane of Somaria to crush the button (the block to the north can only be pushed once, it again sadism). At the end of the cornice to the east, in front of the entrance to the cave where you found the key to the Crystal Temple, you will find a chest with the Piece of Heart #27.
You can collect 300 rupees in Master Arbror’s Lair (Level 3). You remember the button that we could not operate on the second floor? You have to enter the dungeon from behind (go around the west), use the Cane of Somaria to reveal the last chest you could not reach. Return to the main entrance of the dungeon, go directly north using the grapple to cross the ravine, and go up one floor. You are next to the chest.
Return to the Mount Terror, but in the process fill one of your Bottles with water in the village (either at the fountain or in the trough at the pastry shop). You must go to the Mount Terror but on the east side, so on the side of Inferno. Take the entrance to the west of this screen (basically, the only other north entrance besides the Bazaar). Climb the stairs, take guard at the Bubble. Use your grapple on the vases to the north, then a Somaria stick on the left of the wall, go back to the entrance of the cave, then the grapple on your block and drop to the left. Follow the only path available until you exit on a ledge. Jump below, then enter the new cave. Here, a small labyrinth in the middle of a trapped ground will prevent you from progressing easily, but you must not fall from the platform where you are. The right path is the one going directly to the right, then to the north when you can not go further. You go up one floor, you have only one path available so go up one floor down the hall, and there take the first exit (south) as soon as possible. Once on the cliff, turn right, and use the bottle to grow the liana. If you do not have a bottle with water, you can fill it at the waterfall on the left. Once the liana is available, return to the cave, and go northeast.
Jump below, go out, on the right you have the vine with Piece of Heart #28 in the lower right. If you want to try the second supposedly inaccessible cave, go back to the cave level, go west and take the cave to the south. Piece of Heart #31 will reward you. If the experiment does not tell you anything or if it is successful, go back to the liana and keep climbing it. Turn left, reverse the waterfall with the Mystic Mirror, then drop off at the first possible ledge just past the wooden bridge. In the cave, turn on the torch to see where you are going, take Piece of Heart #29, jump into the hole on the left, then a second time. In the trunk you will find the last Magic Bottle. Get out, you are at the foot of the West Mount Terror.
Enter the cave on the left, pass the small precipices, go around the room to put a block of Somaria behind the trapped ground, follow the only path available. Make a C in the dark room to reach a long enough hole. Fall, then go out. Go east to find the liana. Climb, then go east this time. In the cave, go down one floor. Here, the soil is the same bottom as the hole, so it is by moving that you will see the path to take. Be careful, there is a fork on the end, you have to turn right because down is a dead end. With a little practice, you will manage to pass. Exit, and you will finally be in front of the entrance of Level 8, the Rock Peaks Dungeon.