
Latest Solarus Engine is now officially integrated into RetroPie!
Solarus has been promoted to a system in recent RetroPie, just like other popular game engines such as Löve, Adventure Game Studio (AGS) and ScummVM.
Also it has been updated to the latest engine version, allowing to play more quests than before in RetroPie.
What is RetroPie
![]()
Taken from their official website:
RetroPie allows you to turn your Raspberry Pi or PC into a retro-gaming machine.
It builds upon Raspbian, EmulationStation, RetroArch and many other projects to enable you to play your favourite Arcade, home-console, and classic PC games with the minimum set-up.
RetroPie sits on top of a full OS, you can install it on an existing Raspbian, or start with the RetroPie SD image and add additional software later. It’s up to you.
In RetroPie, emulated computers and consoles are organized in systems, each containing a collection of games (or roms) associated to them.
This allows for very easy management and navigation of available games per-system using the default EmulationStation front-end:
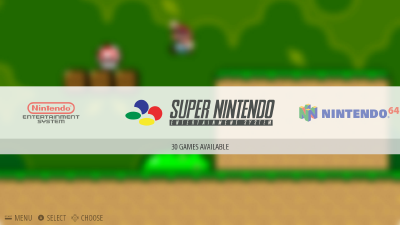
Using this approach, users just need to place their games/roms into designated folders for each system, reload EmulationStation and then the added content becomes visible and ready to launch from the menus.
Since most Solarus Quests are distributed as .solarus packages nowadays and the Solarus Engine can be understood as an emulator for these packages, using Solarus as a system in RetroPie is a natural fit!
Most important, this enhancement enables Solarus Quest Makers to more easily distribute their quests to RetroPie users.
Solarus in RetroPie
Solarus has been part of RetroPie since version 1.4.5 (added back in 2016), with three quests installed alongside it:
- The Legend of Zelda: Mystery of Solarus DX
- The Legend of Zelda: Mystery of Solarus XD
- The Legend of Zelda: Return of the Hylian SE
However these quests have been integrated as ports in RetroPie, meaning that to add new quests one has to create dedicated launch scripts for each new quest. Of course, this is not very convenient.
Moreover, Solarus in RetroPie has not been updated since a long time, with newer versions bringing much needed improvements such as the accelerated OpenGL renderer.
For these reasons, three major goals for an update of Solarus in RetroPie were established:
- Bring an up-to-date Solarus version to RetroPie (current version
1.6.x) - Integrate Solarus as a system so quests can be launched directly from a dedicated folder
- Optimize the usability of Solarus for couch-playing (no keyboard needed)
As of today and after some months of work from Hugo Hromic, the Solarus Team is proud to announce that all of these goals have now been achieved!
Solarus as a System
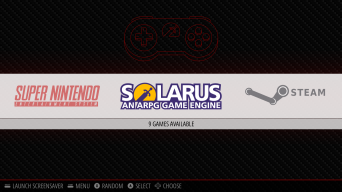
Solarus is now a first-class citizen in the main EmulationStation menu, alongside all other computer and console emulators.
The Solarus Team provided official EmulationStation theme assets for the Carbon theme (default in RetroPie) and two variants of the Simple theme (light and dark). All of them installed out of the box.
Dedicated Folder for Quests
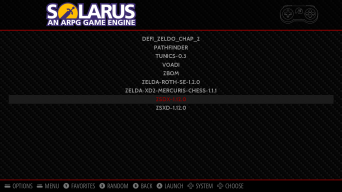
RetroPie no longer installs Solarus Quests with the engine. Instead, users are now encouraged to just download their favorite Solarus Quests (in .solarus format) and place them into the dedicated Solarus folder: ~/RetroPie/roms/solarus. After restarting EmulationStation (to reload the gamelists), all the downloaded Quests become available and ready to launch with a single click.
In other words, Solarus Quest Makers can now easily distribute their quests to RetroPie users!
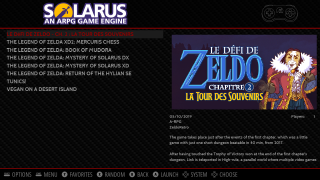
Quest Metadata and Media
One of the most well-known features of EmulationStation is its ability to display game metadata (such as publisher, descriptions, ratings, etc) and images (such as cover art or screenshots) alongside the available games for an improved browsing experience. While Solarus is not currently available in any online scraper, that doesn’t mean you can’t have fun adding the metadata and images manually!
Using Solarus in RetroPie
If you don’t have RetroPie already installed in your device, you can follow the official installation instructions.
To use Solarus in your RetroPie installation, first make sure that you are running the latest version of the RetroPie Setup script by using the Update option in the main RetroPie menu.
Afterwards, in the main menu, choose Manage Packages and then Manage optional packages. In there, you should be able to find the solarus package for installation.
To get the very latest version of Solarus you should use the Update from source option, however it can take some time to compile. If you do not wish to wait, you can use the Update from binary option to get a pre-built binary packaged by the RetroPie maintainers in a regular basis (approximately monthly).
After installing Solarus from the RetroPie main menu, you are ready to place your downloaded quests into the dedicated rom folder of Solarus (~/RetroPie/roms/solarus). More details about transferring games to your device can be found in the official RetroPie documentation.
Configure Solarus in RetroPie
The new Solarus RetroPie integration includes a new user interface (UI) for configuring your installation.
It can be accessed in the main RetroPie menu by choosing Configuration / tools and then the solarus option.
Currently, there are two basic configuration options for Solarus in RetroPie:
- Set joypad axis deadzone: to set how sensitive your joypad is in Solarus
- Set joypad quit buttons combo: to set a combination of buttons in your joypad to quit Solarus while in-game
These options are designed to improve the usability of Solarus during couch-playing (without a keyboard).
For more information about RetroPie and to get support for the Solarus integration, please visit their official user forums.
We really hope that Quest Makers and Players alike can both fully enjoy Solarus on the big screen in their living rooms with RetroPie!